Showing posts with label giveaway. Show all posts

Monday, March 7, 2011

Winners and a New Project

I did not have a very large response to my giveaway on the tissue holders so I've decided to give one to each of the four ladies who left comments on the post:  Susie, Angela, Margaret and Susan.   I hope you enjoy them!

Above are some squares I've been sewing together tonight.  I saw a most interesting tutorial on Stash Manicure this morning for a  Disappearing 16-Patch block.


Of course I had to try it.  Couldn't resist.  Didn't even try.


Here are two of the sixteen patches, cut into quarters and assembled in two possibilities.  There will be more options when I get more blocks made.  You like?

Have you found something interesting to try today?  Hope so!

Hugs and kisses,

Friday, March 4, 2011

Oh, Wow! Look at the Time.....

If you look on top of this nice little pile of cuteness you will see that the clock is reading 3:00.  That's a.m.  Oh, my, I just have such a hard time going to bed at night.  What can I say?  Inspiration strikes and I just go with it. 


Here, I've spread out and numbered the little pile.  That's because I'm going to give away three of these cute little tissue holders.  I started making them earlier in the evening and before I knew it I had a dozen made.  Here's the link if you'd like to give it a try for yourself.


They contain perfectly one of these little packets of tissues.  Or you could just fold a pile of tissues and put them into one.

This is what the back of each one looks like, correspondingly numbered.


If you would like to have one of these, just leave a comment, and be sure to mention which one you would like.  I will choose three winners on Monday night.  I will leave comments open until 6:00 p.m. my time Monday evening.

I finished the little pocket tissue holders early in the evening.  What kept me up was this little quilt.  I finished the quilt top on Wednesday and loaded it on the frame, but I had trouble.  I used some of the hand-dyed fabrics and the machine did not like them - kept skipping stitches.  Last night I decided to try a smaller needle and polyester thread.  It worked! 


So I worked, too.  I got a lot of it quilted!  Yippee!  If you look closely at the bottom right you will see that I had to piece the batting.


I do so hate to waste anything, so I usually piece batting scraps to make up whatever I need.

And oddly enough, I've found that the machine blanket stitch does a better job of holding it together without skewing it one way or the other.


I also got a pile of fat quarters in the mail from Connecting Threads.  I know, but I did not resist that sale.  Anyway, I like my fabrics washed before I use them.  My hands are not fond of the dyes and sizing.  I discovered Connecting Threads quite a while back on Quilt Taffy.  She had written about their beautiful thread and I had to try it.  I like it!  Their fabrics are nice, too - very soft.  Looking at these after laundering them, I was tempted to buy enough to make something to wear.  They feel so good!

I've made a start at folding them, because after all, we must have some sort of order, mustn't we? 

Please comment if you'd like one of the tissue holders and don't forget to tell me which one you'd like.  I'll post the winners Monday night.

Have a great day!

Hugs and kisses,

Sunday, August 16, 2009

Birds, Kitten and Goodies in the Mail

Yes, I get these looks a lot! :)

Here's a little glimpse of some of the birds I've been watching lately. I can't tell you how much I enjoy seeing my private little aviary.
Miss Chloe enjoys watching the view from the window, too.


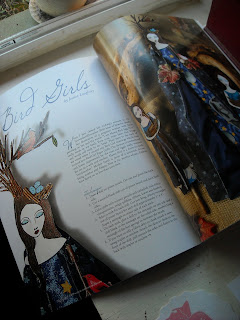
I was very fortunate to win a giveaway on Texan's blog recently - these very interesting looking quilting magazines. I've already dipped into a couple of them. Thank you so much, my fellow Texan!
I finished the quilt for our daughter's friend (and ours). Yippee. I think it turned out really well. I'll show you pictures tomorrow.
Enjoy the rest of your weekend.
Hugs and kisses,

Wednesday, July 15, 2009

Goodies!

I received some lovely gifts in the mail all the way from Australia! Margaret of Cosmos and Chrysanthemums had a giveaway a little while ago and I was one of the winners. You should see her beautiful handiwork. I got this beautiful little messenger bag ...........


and this oh, so pretty apron. Wow! How did you know Margaret that I've been wanting a pretty apron? I just have never quite pushed it to the top of my to-do list. And now I don't have to.

This is part of the backing for a new quilt I'm making for my brother. For some odd reason he likes bats. And this is only a small part. The rest of it is a lot more mainstream. :) I'm at the good part now - machine quilting. It's a pretty good-sized quilt so it may take a while.

Hope your day has lots of good things, too!
Hugs and kisses,

Thursday, April 16, 2009

How About a Virtual Quilt Festival?

Hi! Interested in a virtual quilt festival? Click on the button below or go to Park City Girl and get ready to post your favorite quilt and story of it, starting on Friday. There are prizes!


Have a great day.


Hugs and kisses,

Thursday, April 2, 2009

I Am On A Winning Roll!

Look at the goodies I got in the mail! Susan, you really got me started on this winning roll. :)


I won a give away at Quilt Taffy from Corrie and Des. I love their blog. Lots of good information, and sometimes they just crack me up. Anyway, Thanks to Corrie and Des! You rock!


I've never even looked at one of these Somerset Studio magazines, but I see lots of inspiration here. Have you noticed that even if it's not your particular crafting niche - - - others' creative works can still inspire you? I like to be inspired. It's hard sometimes to maintain that creative flow, but that's the beauty of blogging. We all spark each other's creativity. And often that's all it takes - just a spark and you're back in your creating mode!


Look at these great paintings from Danita. She has some affordable prints of her work in her etsy shop, too, as well as original art - lots of it.


And also in the mail today - - - - from Material Girls via ebay - - - - these charm packs. I'm liking using these right now. So many possibilities!


And if you haven't visited the Moda Bake Shop yet, you surely should! There are so many good ideas there.


Hope your day has had a full measure of inspiration, too!

Hugs and kisses,

Saturday, October 11, 2008

Winning Opportunity

This morning as I was checking on some of my favorite blogs, I saw that Anna Maria Horner's new book, Seams to Me 24 New Reasons to Love Sewing is almost out! And not only out, but her publisher and some other nice folks are having a sweepstakes to celebrate said book. They're giving away some good stuff!

But you probably shouldn't go there and enter. That would mean more chance for me. :)

Have a good night!

Saturday, April 26, 2008

We Have A Winner! Make That Two....


It is with great joy and happiness that I announce the winners of the Bloggy Giveaways Carnival for Muddling Through:


The beautiful tatted bookmark
goes to Amy , and my notepad/pen holder


goes to Wendy .

Thanks to everyone who left a comment. I hope you all had as good a time as I did. Free is my favorite word!

Have a great weekend!

~Elaine~

Tuesday, April 22, 2008

Tutorial for Notepad/Pen Holder

As promised, I'm going to try to explain how I make the notepad/pen holders like the one I'm giving away in the Bloggy Giveaways Carnival.


To start, here's a materials list:


2 - 8 1/2" X 6 1/4 " pieces of material (This will be your outside covering and inner liner. You can use different materials or the same. I used the bears.)


1 - 8 1/2" X 6 1/4" interfacing (I used the stiffest Pellon I could find for all interfacing.)


1 - 4" X 5" fabric (This is for the pen holder, and you will double this one, right sides together with interfacing below sewn to it.)


1 - 2" X 5" interfacing (See, it matches the pen holder above when it's folded.)


1 - 1 3/4" X 5" fabric for tab to close notepad/pen holder.


1 - 1 1/4" X 2 1/4" interfacing


2 - 4" X 5" fabric for pocket to hold notepad


1 - 3 3/4" X 5" interfacing


2 - 4" X 4" fabric for pocket opposite notepad


1 - 4" X 4" interfacing


(I know I didn't picture these past two


items. What can I say? It was late:))


Okay, to start, take your outer cover fabric and inner liner fabric and put together, right sides facing. Top with interfacing and stitch 1/4" from edge of fabric. I stitch at least twice around and then zig zag on the outer edge of those lines of stitching, leaving about a two inch opening to turn.


You can see in both the front and back sides here if you make the pictures bigger by clicking on them, the opening on the left side.


Turn carefully to the right side, poking out the corners and pressing. Now, top stich all around the edges, cleverly closing the opening you turned it through. Then, quilt however you choose all over the cover.


Repeat this process with each of the other parts of the holder, and you will end up with 5 quilted pieces that look something like this.


I've pictured the handy-dandy ring snaps I like to use, along with the pliers made specially to put them on. Great gadget.


The ring snap with the sticking out part should be attached to the outside portion of the cover. I'm showing you the inside portion because I'm going to cover it up with a pocket.


At the bottom in the picture above is the tab that will close the notepad/pen holder. Attach its ring snap now.


Carefully sew the inside pocket over the ring snap, leaving the top edge open. (It will break your sewing machine needle if you hit it.)


Position the closer tab under the other pocket you're ready to attach to hold your notepad. Be sure the snap closures line up so they will actually close the notepad/pen holder.


Sew around the notepad pocket, leaving the top edge open. It's a good idea to reinforce the area where the tab closer lies between this pocket and the body of the notepad/pen holder.


Now, sew the pen holder to the edges of both the notepad pocket and the pocket opposite, and you're finished!


I know this looks a little complicated, but if you'll take your time and be sure everything lines up, it is really simple.


I made a lot of these last year for Christmas presents, and I carry one in my purse all the time. It's great for grocery/to-do lists. You can put receipts and/or coupons in the pockets, and it doesn't take up a lot of room. I make mine in these dimensions because this size notepad is readily available here. It is easily alterable for whatever size you prefer.


Let me know if you try this. I'd love to know how it goes for you. If you have any questions, I'll try to answer.


~Elaine~